Nu-media - NM.Ver3/4 & NMLite Software Download Instructions
The following instructions were composed for installing Numedia Led Sign Software. The version you are downloading is specific to your sign(s) and may not be re-distributed for use with any other models or versions of our signs as this could render your sign inoperable in be subject to service & support fees to resolve the issue. Ensure, after installation that you have the right version by going to the 'Sign Properties/Sign Parameters' and verify that the serial number in the "Sign Name" field matches your Invoice. This Serial Number is also required for technical support and service requests.
A typical Numedia installation takes about 125 megabytes of disk space.
You may want to print these instructions before proceeding. You should read each step completely before performing the action it describes. These products may change slightly each launch of a new O/S (Operating System) so we would appreciate it if you would let us know if you find any discrepancies between these instructions and what actually happens when you try to follow them.
IMPORTANT: You must have Administrator privileges to install and use the software & drivers required.
Downloading
- Click on the link provided to you to begin the download request. It will look similar to the following:
http://nu-mediadisplays.com/software/SNxxxxx.zip
A page, with this label in orange, will be displayed in bottom of your browser (Internet Explorer)
DO NOT select the Open button; Select "Save as.."
NOTE- For older operating systems such as Windows XP, you most likely will see a warning at the top of your screen asking you to confirm the possible risk, and select download anyhow.
- Select "Save as.." and by default it usually will saved in the "Downloads" folder. Save the file it is about to download somewhere on your disk drive. You may want to select your "Desktop" for ease of finding it. Store this zip file somewhere permanent on your disk drive, so that you can reinstall it later, if necessary. This file is only about 5-10 MB.
*you may receive a security warning at this point which you can ignore as we are a trusted source.
Once completed, click its Open button .

- The file will be named SNxxxxx.zip, and will open up for you to view its contents. The exact form of this interaction will depend on the version of your operating system, and/or any third party software already installed that handles zip files; for example WinRar or WinZip
By default windows shows you the contents of the ZIP folder, which at this point needs to be extracted. Select the "Extract all files" button, or alternatively it is also found under the "File" menu.
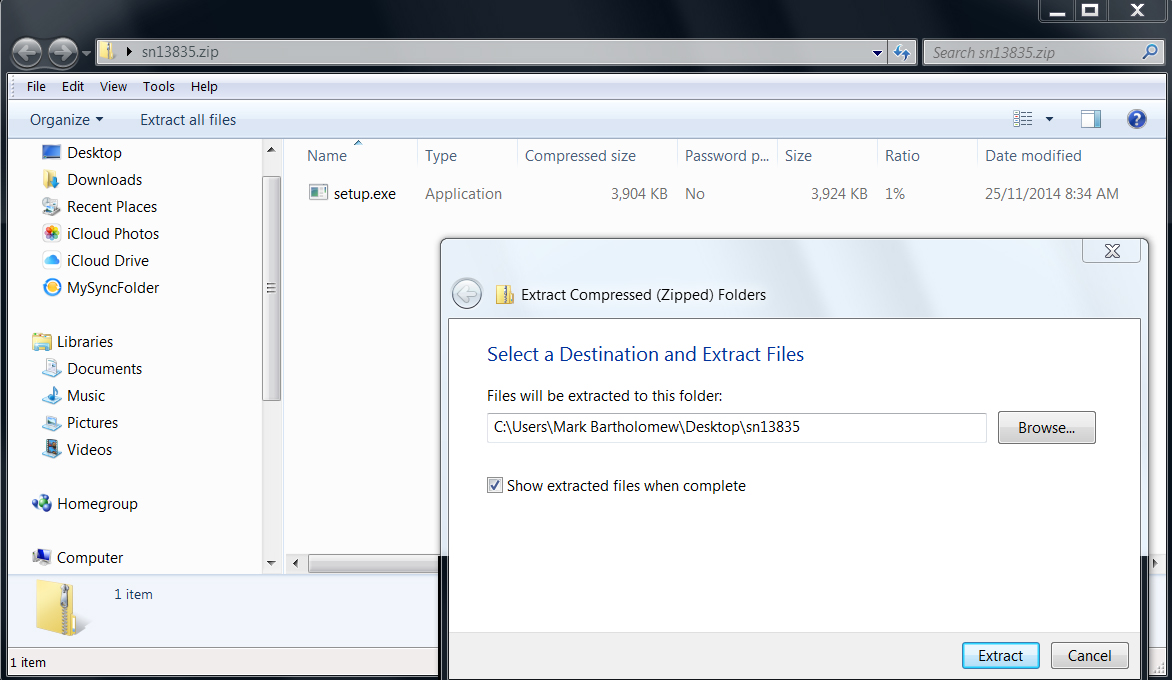
This will now bring you into another folder which will be named differently , without the Zip extension, and where the extracted setup file can now be launched to begin the installation process.
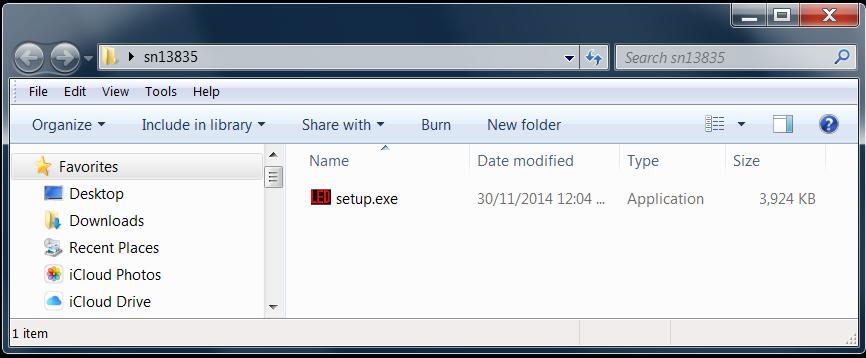
- Terminate/Close (X) any other windows remaining from this process (e.g., the Download window).
Installing
- Double-click the file that you just extracted, to run it.
Click Run to the Open File - Security Warning pop-up. You will see a Windows Installer window temporarily then a Preparing to Install window temporarily.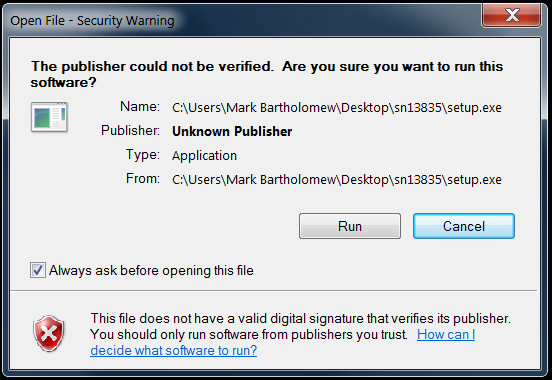
- Possible Virus or Unsafe file application warnings may occur depending on the software being used. These are 'false positives'. For example Norton Security does not recognize the file nor has many reported users of it, therefore they give this warning which must be carefully read and allowed to run. Note the check box at the bottom, and choose to "Run this program anyway" button, otherwise the installation will fail and will not be successful on the next attempt, until the warning is excluded.
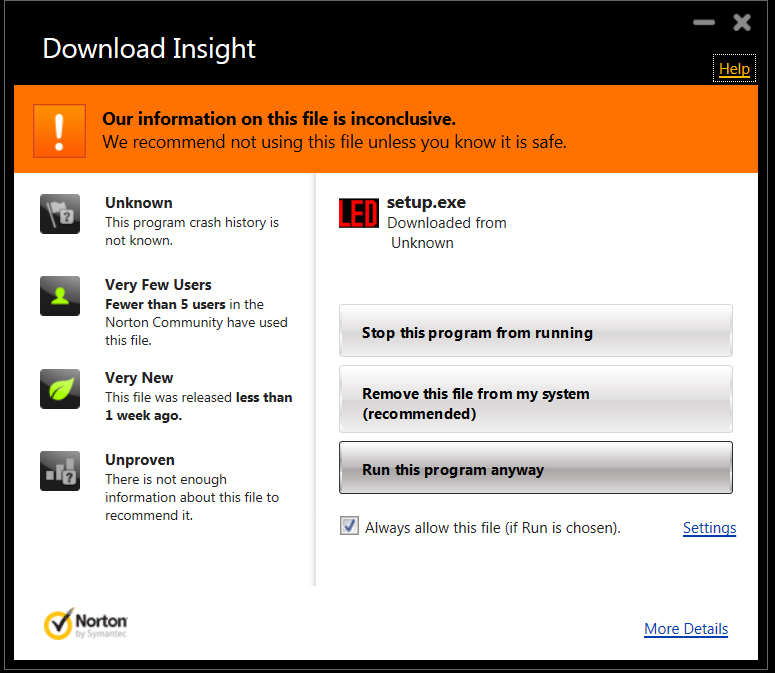
- Once the setup is allowed to launch, you will see the software's splash screen and then the "Setup Wizard" will begin.
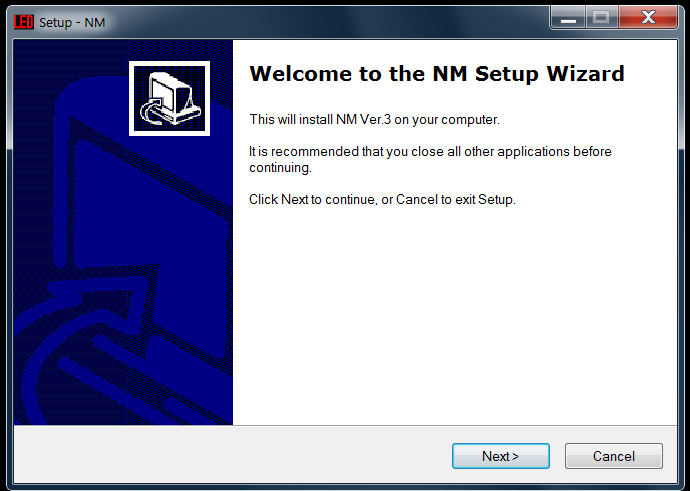
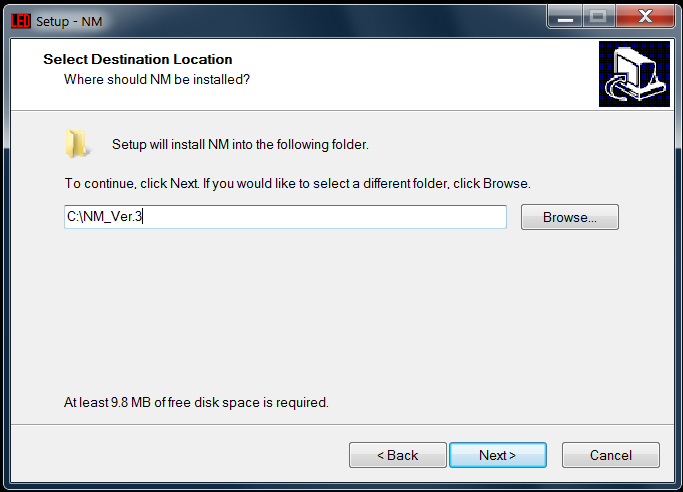
Click the Next> button.
You will see a "Select Destination Location" window and the default is the suggested place to install to, mainly because it will not run correctly if under the C:\ProgramFiles (or x86) folder.
NOTE-->if to be used by multiple users, it is highly suggested to install ONLY 1 instance of the software to a Network Shared folder, however this may also require that the communication device used to communicate directly with the sign must be network accessible by all users.
- Click the Next> Next> Install> button.
- You will see an Installing window, then Complete window, then Click the Finish> button.
-
You should now have the Numedia software Icon on your desktop and in your Start Menu for launching the program and making the final configuration settings to establish a connection to the sign.

Configure
- Launch the Numedia application.
- You will see a Choose a Com Port window. Select whatever one you been instructed to use. Serial communications port is required for this option, otherwise if there is no comm port available to the software ten you will receive the following window:
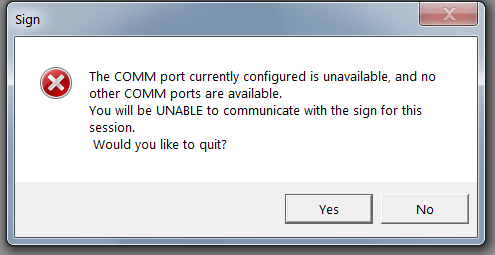
Choose "No", and proceed with the instructions that device came with for setting it up. You can always choose again later if needed by going to the Sign Properties>Sign System Configuration window.
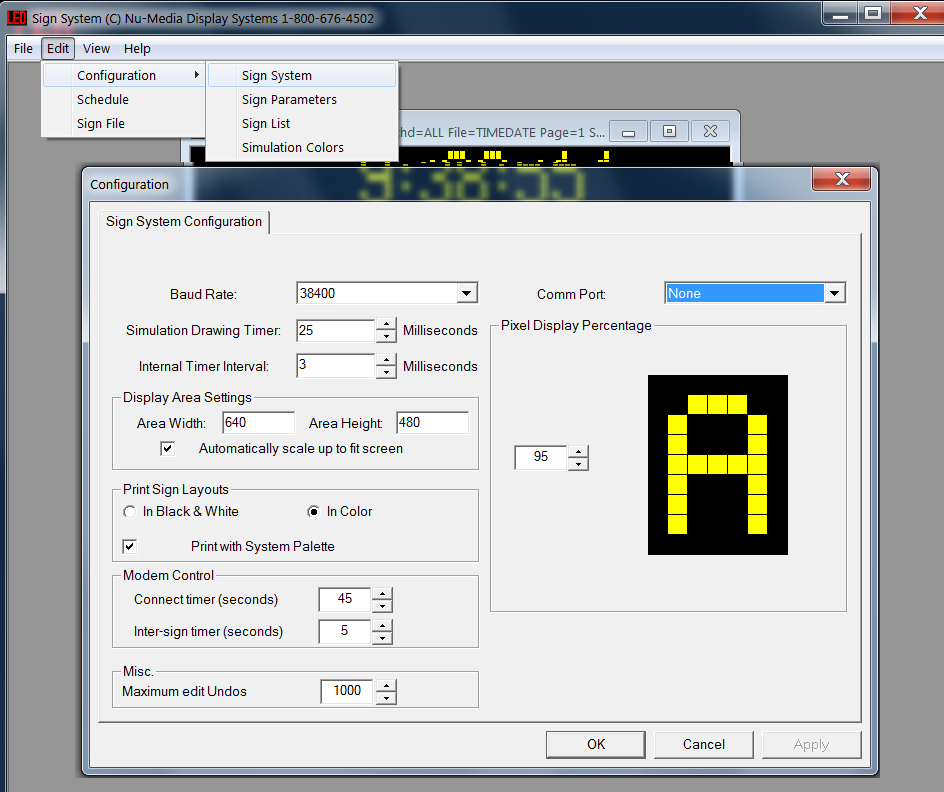
- Test your connection to the sign by going to the "Sign Properties/File Organization" Tab. Your files that are existing on the actual sign should show up in the "Sign Files" section in the middle of the screen, after the communication window that pops up in front of the sign properties window finishes making the connection.
By default we place a Timedate message on the sign and the 2 main software files (signctrl/config).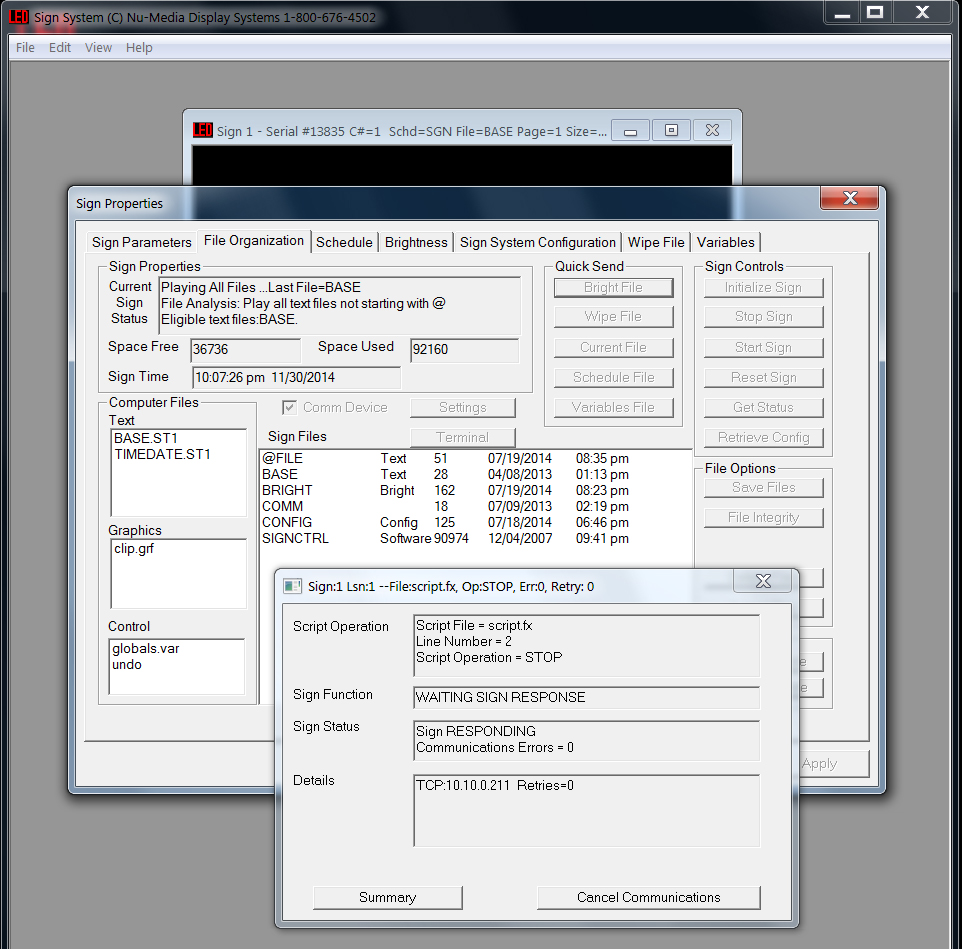
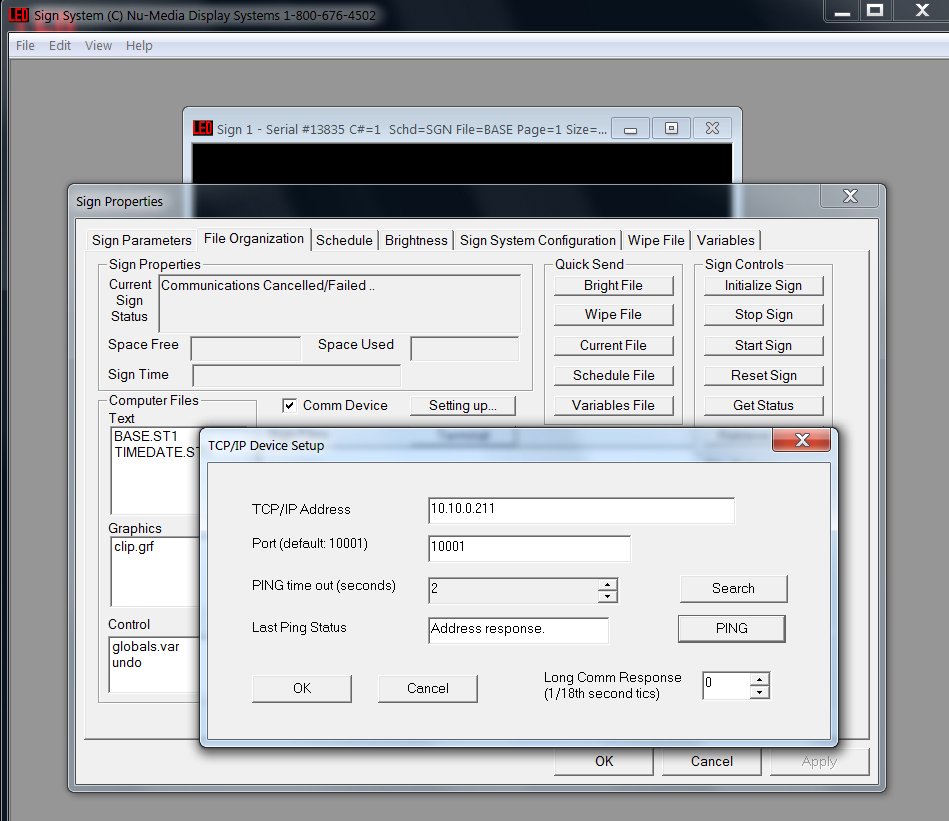
- For setting up TCP/IP Connections, follow the instructions that came with your device and enter the IP address in the "Sign Properties/File Organization" tab, and checking off the Comm Device box, and enter it on the TCP/IP Device setup screen. You will see a Ping button to the right for testing its connection, set the change the Ping Timeout setting to 2 and once you get an "Address Response" change the Ping Timeout setting to 10 (this disables it for security reasons), and close the window. Test your connection as per #3 above.
- Press the OK button to close the Sign Properties window and proceed to Using the Editor to make new messages in the Quick Start Guide.
